Skip navigation

Category Archives: Technical Articles

This section is mostly filled with techincal articles and car projects.

Last year at BIR, Ronnie from RSMotors and I both blew our 4th gears.  We were both running stock turbos which spool up quick resulting in high amounts of torque.  Then put us on a track where 90% is all 4th gear.  The result was both of us killing 4th gear just hours apart.   Later that year, Brandon Ranvek ruined his 4th gear at a DCTC test event just a few weeks before the Las Vegas USCA event.  Then we started to see reports of others with 4th gear problems.  So we searched for a solution.

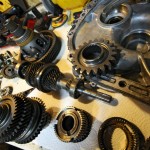
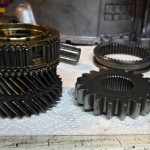
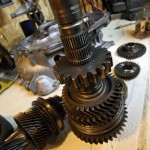
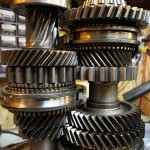
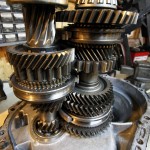
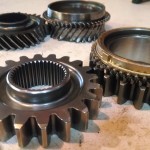
This is what we’ve come up with.  A company in Australia (PAR) makes an OEM fitting synchro’d straight cut 4th gear.  This gear comes in any ratio you want, but this specific one we are testing is a 1.0 which adds a little more top speed to 4th over the evo 8 gearing (and even more mph than the 9 gear).

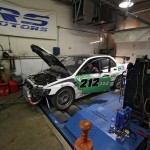
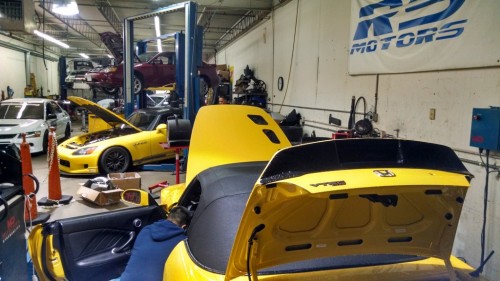
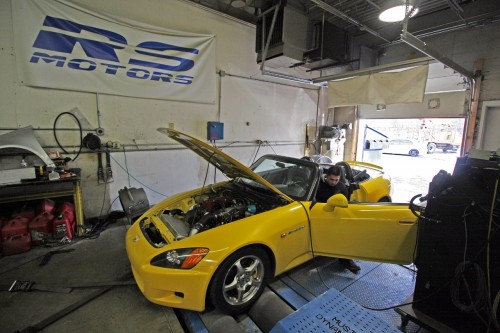
Ron at RS plans to test the trans on his dyno doing back to back 4th gear pulls.  No real track testing until the snow melts (or we travel south).

Update (Jan 31 2015)-
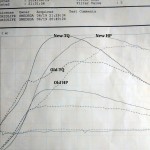
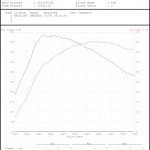
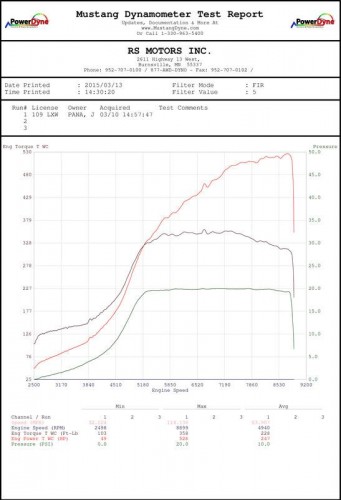
Installed trans and strapped it on the dyno.  4th gear held up to multiple 4th gear pulls from 2000rpms up to 7500rpms.  The car we tested this with is making 430TQ before 4k rpms.  The torque ramp is what will eat the 4th gears, so this seemed like a perfect car to test with.  Not a single issue.  We plan to pull trans back apart and inspect the gear, but we feel pretty confident this is the real cure for the weak factory 4th.

Also, the whine from the straight cut doesn’t seem all that bad. We’ll get some in car videos up shortly.

Stage 1 testing complete.  More track testing to come in the next few months.


Jodan ran a Comptech Supercharger for several years, and while that did up the power 150hp over stock, he wanted more.  So out with the Supercharger and in with a big turbo.  Jodan did this right, heavily researched and didn’t cheap out on anything.  Here’s how the process went.


Supercharger removal.

IMG_20140612_202116003 (1024x625)

Engine Removal.

IMG_20140613_180113493 (1024x633)

…And its out.

IMG_20140614_105845836 (1024x576)

Making space for the turbo.  Battery and windshield washer reservoir were relocated to the trunk, while the Fuse box was put inside the fender.  Only a few wires needed to be extended.  Time consuming but well worth it.  No one likes a melted fuse box.

IMG_3629 (1024x683)

Blowing a fuse just became a little more difficult.

IMG_3641 (971x768)

IMG_20140726_170126181 (1024x729)

Removed cylinder head, installed some ARP head studs along with a fresh OEM Head Gasket.

IMG_20140718_164907367 (576x1024)

Cylinder head cleaned and checked for flatness.

IMG_2824 (768x898)

And for some high revving pleasure, some dual valve springs.

IMG_2765 (1024x619)

Cams all re-installed and valve clearance adjusted to spec.

IMG_20140809_121852658_HDR (1024x576)

Mocking up the turbo setup.

IMG_20140718_193437348 (576x1024)

Resurfaced OE flywheel.

IMG_4035 (1024x757)

Stage IV Competition Clutch

IMG_4039 (768x896)

And to hold the motor in place, some stiff engine mounts.

IMG_4031 (1024x683)

Motor back in.  Now the real fun begins.

IMG_20140809_173423204

Very tight fit with the manifold.  Cut the lip on the frame to allow for a bit of wiggle room.

IMG_20140816_123219750 (1024x576)

Most boosted S2000’s suffer from heat.  Not this one.  Science of Speed’s V-Mounted I/C and Radiator setup should allow for more than enough cooling.

Had to cut out one of the front radiator supports and replace with the SOS pre-fabricated V-mount brackets.

IMG_20140816_124826119 (1024x576)

IMG_20140816_130235186 (1024x576)

IMG_20140816_130245876 (1024x576)

Radiator and I/C test mount.

IMG_20140816_140817695 (1024x576)

Cleaned up some small surface rust and paint matched where the battery used to sit.

IMG_20140830_160818911 (576x1024)

Battery relocated to trunk.

IMG_20140901_172024813_HDR (576x1024)

Twin AEM 340 pumps mounted in SOS Surge tank.  If you know S2000’s, you know they start to fuel starve at half a tank.  This surge tank is fed by a single 340 pump and utilizes all new feed/return lines going to the AEM fuel rail.  Fuel should not be a problem no matter how much he turns the boost up.

IMG_20140910_191011164 (576x1024)

Downpipe fabbed, test fitted, welded, heat wrapped, installed.

IMG_20140918_213135647 (576x1024)

Turbo bolted and safety wired.  Dump tube still needs to be modified.

IMG_20140919_191816564 (1024x576)

Next step was to take the car over to Ronnie at RS Motors in Burnsville MN for some dyno time.

IMG_20141001_101349864_HDR (1024x576)

IMG_7490 (1280x853)

Ran into a few small problems but we fought through them.  Ron noticed the AFR’s going lean at high rpm.  Found that the AEM fuel regulator was leaking and wasn’t happy with the added boost.  Good thing Full Blown was right down the road.

Just like any big build, its very likely to have a few issues to work through.  After all bugs were sorted, Ronnie did some tuning and achieved more power that we originally anticipated.

10411101_10102126715434218_5517285134248719327_n

To help keep this car planted, some new Hankook RS3V2 tires were mounted.

IMG_20150403_184314122 (1280x721)

Modified the dump tube-

IMG_20150403_181149023 (1280x721)

Its been a long project.  I’ve grown very attached to this car.  Thanks Jodan for letting us perform the work and creating a monster.

IMG_7914 (1280x846)

And no, this is not just a show car with 500whp.

IMG_7981 (1280x853)

IMG_8016 (1280x792)

Spent several sessions on track pushing the car.  Temps stayed perfectly cool and went through the entire day trouble free.  Even drove the car to the event.  #RealStreetCar

Visit Us On FacebookVisit Us On YoutubeVisit Us On Twitter