I’ve been asked about this many many times and figured it’s been time to do a write-up.
Little background-
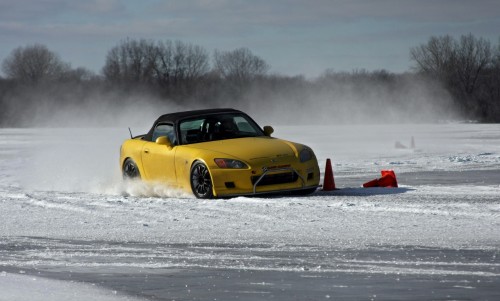
A few local car nuts decided it was time to take our car club to the next level and host a series of automotive events around the Central Wisconsin area. We created a legitimate non-profit car club called “Central Wisconsin Sports Car Club Inc.” We host various types of events from autocross to ice-rallyX and even a few HPDE’s. For the timed events, we needed something more than just a few stop-watches. Being a new club, we didn’t have much (or any) money to start off with. We couldn’t just go out and buy the big name “Race America” timing system that most SCCA and other clubs use. We were looking for something cheaper, MUCH cheaper. We stumbled upon FarmTek, a company that does electronic timing for dog agility and barrel racing. Why couldn’t this be used for autocross? With a price tag of nearly 1/5th of the Race America system it was worth a try.
We did go through lots of testing with this, as it wasn’t a complete turnkey solution (at that time). We had some obstacles to get through, and the first season using it wasn’t all that great. We fined tuned many aspects of the system and today, the system works flawless and fits our needs 100%. I won’t go into the details of everything we changed over the years, but I will go over key things that need to be done to prevent problems.
Introduction to the core timing system-

Cost: $1084
With this you get the timing console, 2 sets of timing heads, tripods, and a really nice case to carry it in. This is everything you “need” to time an event. For results you would need to record everything either by hand or manually enter this into a spreadsheet or something. There are a few small additions you will need to the basic setup. First and most importantly, an external 900MHz antenna for the console. Getting that antenna up high is very crucial (and even more so if you are doing timing in an enclosed trailer or something). It’s only an extra $25(I think) and can be purchased directly from Farmtek. The other part you will need to do, always use brand new batteries (4-AA’s and 4-9Volts) prior to every event. As the batteries get low, the signal seems to drop. There is nothing more annoying than stopping the event and replacing the batteries. Just install fresh ones from the start. After you have this base setup, you will want to start to add things to your timing system. I will try to put these in the order of importance.
Spares-
Always have a backup plan. It’s a good idea to at least have a spare set of eyes and tripods (+$270) in the event a car spins and hits them at the finish. I can tell you they are pretty durable as we’ve had ours hit several times and they still work today. When and if your club has enough funds, buying a few more spares along with a spare console isn’t a bad idea.
Scoreboard-
Got to have a scoreboard. A bit expensive but will surely make events much more enjoyable for all. Don’t waste the money on the big scoreboard, it’s not worth it. the 7in LED ($750) one can be seen from a LONG ways away. Get the case too (+$120) and the stand($79). Their new scoreboard appears to be DC powered and you can add in their external battery pack/charger for another $75. (We have their older scoreboard which is A/C powered which requires a car battery and a power inverter.) Another accessory they offer is a wireless adapter for the scoreboard (+$175). Not needed but really makes course setup much more flexible. And if your club really has money to blow, you can run TWO wireless scoreboards at the same time (one in the pits, and another at the finish).
Computer/Axware Timing Software
This is now going beyond what Farmtek has to offer. First, you will obviously need a Windows based laptop. The computer doesn’t need to be anything special but as of now, I’ve found a low end laptop running windows 7 64bit and nothing else to be very reliable. Our club purchased a cheap Acer-Special ($400) and I cleared all the trail-ware crap off of it. Now for the software, Axware. Axware is an autocross specific timing software designed to make your job easier. You will at the least need the Axware Basic ($270) and be sure to select the CP705 timing system when purchasing/installing. I don’t think I’ll go into details of using Axware as that will take me forever. I will just encourage you to start playing around with it and practice by setting up a few test events (perhaps setup a pedal bike autocross with your friends to get some experience, and yes that’s what we did).
Getting the Farmtek timing console to sync with Axware-
Hopefully when you purchased the timing console, you told the nice people at Farmtek you were going to use this for autocross. They should know by now to setup the console to use the Tag Heuer CP705. This allows Axware to recognize the information the console sends to the computer. The console should come with a serial cable, but you will probably need a USB-Serial adapter unless you are working with a 10 year old laptop or something. These USB adapters can be purchased for cheap ($25), and I think FarmTek can even sell you one. Once all connected, you will need to tell Axware what COM port the timing console is on. This can be done by opening Axware, then going to “Setup” > “Options” > “Timing Port Configuration.” Once that is complete and you have your event all setup, you simply press the button to “start communication with timer.”
LONG Range directional Yagi Antenna-
This isn’t needed, but I do recommend it. Certain venues force us to setup our course where the finish is a pretty far distance to the timing console. This can cause missed trips which is something us timing guys really hate. We’ve been able to almost triple the distance with this long range antenna. It requires a bit more setup but is well worth it. I forgot the cost, but I want to say $150-ish and we purchased it directly through Farmtek.
Timing Tips that will save you much frustration-
1. When setting up a course, try to maintain line of site with the timing heads and the console. Wireless communication works much better if it doesn’t have to go around obstacles.
2. I said this before, but use new, fresh batteries prior to each event.
3. Put several clear sandwich baggies in the timing box. Ya never know when someone will give you a sammich and you just aren’t hungry at that time. Lol, ok seriously, the bags are for the timing heads in the event it rains.
4. In Axware, always save the event every 5-10 cars. Nothing in life is perfect, and we’ve had windows or Axware crash on us. It’s rare, and hardly ever happens, but when it does and you haven’t saved the event, you’ll be entering in times manually. And this brings me to my next point:
5. Have someone writing down times/Car#’s on paper. This is your backup in case something happens to the computer. It may seem redundant and that’s because it is. This is just another way to catch mistakes and correct them. Doing audits after every heat isn’t a bad idea to ensure the correct cars got cones, Re-runs, and/or DNF’s.
6. Practice/test. Don’t use real events to test this stuff. When you got 70+ people all waiting on you, things get stressful and it’ll take the fun out of it all.
I think that’s all, for now… I’ll add more info, pictures, links, and tips as I think of them. If you have any questions, feel free to drop me a line at andy at northsidecomputers.net.
Few excellent links:
Farmtek’s Autocross Manual: http://farmtek.net/bpolegro_polaris/Autocross.pdf
AXWare Autocross Software: http://www.axwaresystems.com/axproducts.htm
AXWare store: http://axwaresystems.com/store/home.php
Coolest Car Club this side of Mississippi: http://www.cwscc.com
I am not affiliated with either Axware or Farmtek. I hold no reasonability for the information above, things change over time so I’m sure new things will come out/change and my info will not remain accurate. Be sure to do your own research.

